Help Center
Windows 10 - Set IVPN DNS servers manually
In some cases, it may be beneficial to set DNS servers on your system manually. The IVPN App does this automatically, though this can he helpful with some manual VPN connection.
-
Open the
Control Panelby clicking the Start menu icon and typingcontrol panel -
Click
Network and Internetfollowed byNetwork and Sharing Centre -
Click
Change Adapter settings -
Right-click the icon for the Ethernet or Wi-Fi network adapter and choose
Properties -
Click
Internet Protocol Version 4 (TCP/IPv4)and click thePropertiesbutton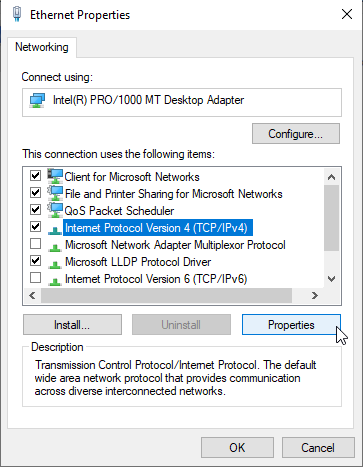
-
Switch to
Use the following DNS server addressesand enter the IVPN addresses. We offer different internal options plus one public DNS servers:10.0.254.1 = regular DNS with no blocking 10.0.254.2 = standard AntiTracker to block advertising and malware domains 10.0.254.3 = Hardcore Mode AntiTracker to also block Google and Facebook 198.245.51.147 = public, validating, non-logging, recursive DNS server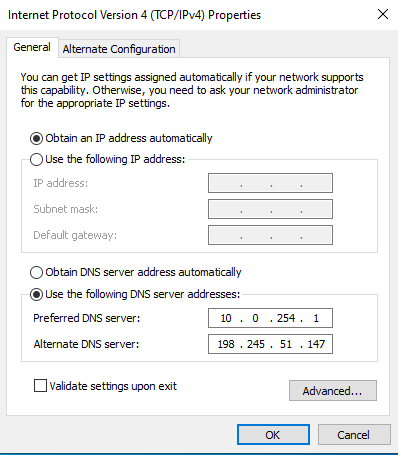
-
Click
OKon the IPv4 properties window. ClickCloseon the network adapter properties window
Related Articles
- Windows Defender SmartScreen prevents the installation of IVPN app. Why?
- Windows - How do I configure OpenVPN to start automatically?
- Windows - My IP address doesn't change when connected, why?
- Windows - "DNS Cannot be resolved"
- Windows - How do I configure OpenVPN to save my credentials?
Still have questions?
Get in touch and we'll get back to you in a few hours.
Contact supportInterested in privacy?
Read our latest privacy news and keep up-to-date on IVPN services.
Visit IVPN Blog